Did you miss out on all the crafty fun of the Mumbler’s 12 Days of Craftsmas? Fear not we have loaded all the amazing crafts together so they can be enjoyed through the festive period!
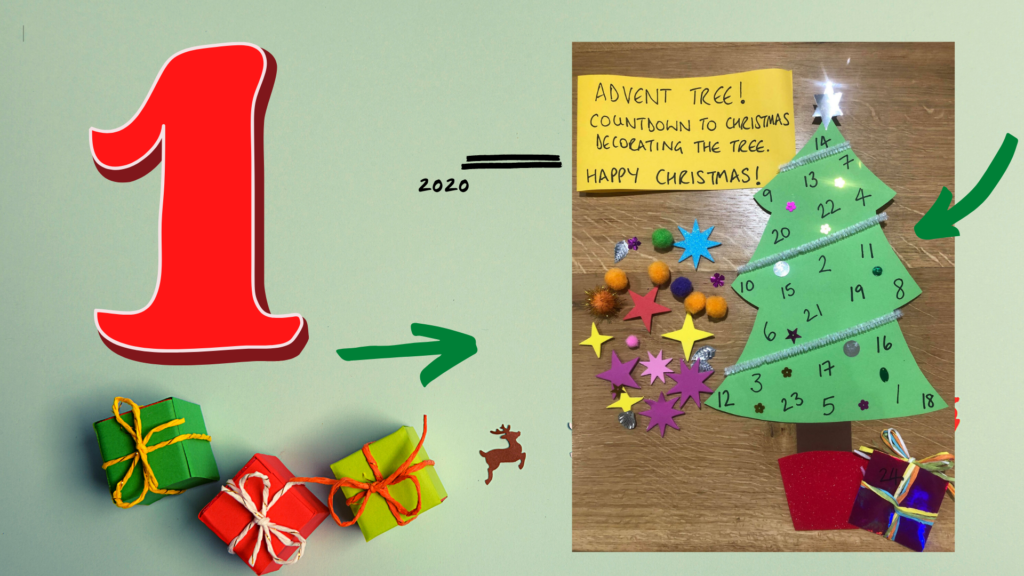
Advent Tree
Something fun to do at the start of December but the fun continues all the way to Christmas Day!
What You Need:
- Green, Red, Brown and Silver card, pen or paint
- Black pen or paint
- Glue or tape
- Pom-poms, stickers or decoration shapes
- Pipe cleaners for tinsel
What to do:
- Draw a Christmas Tree shape on green card and cut out
- Draw a trunk shape on brown card and cut out
- Draw a pot shape on red card and cut out
- Stick together your 3 card shapes to form a Christmas tree
- Attach your pipe cleaners as tinsels taping the ends to the back of the tree
- Cut out a star shape and stick to the top of the tree
- Use the black pen to write numbers 1 – 24 on the tree. This can be done by working top to bottom or randomly depending on how you wish to decorate your tree
- Use pop poms, stickers or different coloured cut out shapes to cover each date throughout December.
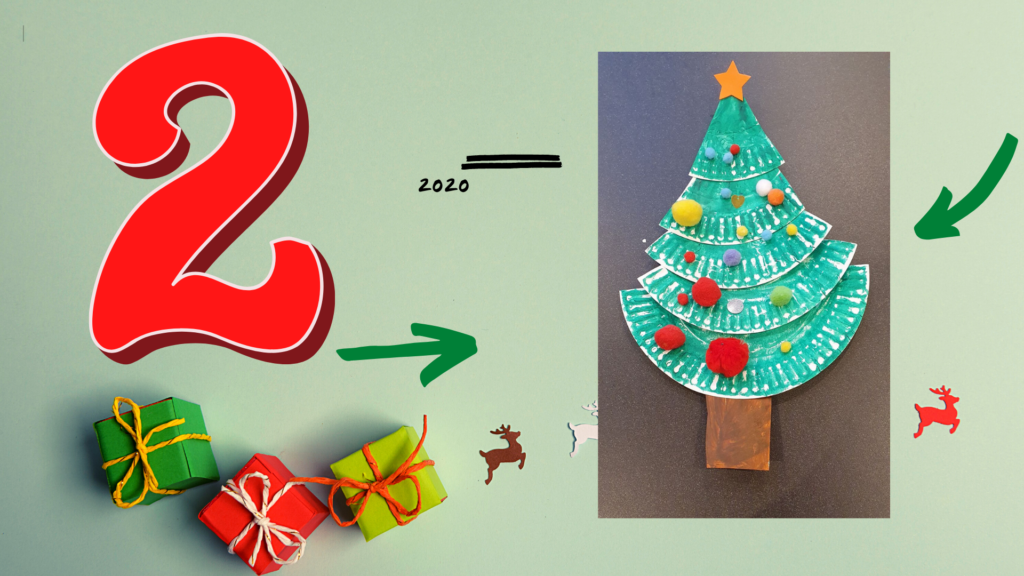
Paper Plate Christmas Tree
Time to get the Christmas Tree up!
What You Need:
- Paper Plates
- Green & brown pen or paint
- Glue and tape
- Pom-poms, stickers or decoration shapes
What to do:
- Cut the paper plates into varying triangle shapes
- Cut out a trunk shape
- Stick together your triangles by taping on the reverse to form a Christmas tree shape. Start with the largest triangle at the bottom and reduce in size.
- Cut out a star shape and stick to the top of the tree
- Paint or colour the plates green and the truck brown
- Use pop poms, stickers or different coloured cut out shapes to decorate your tree
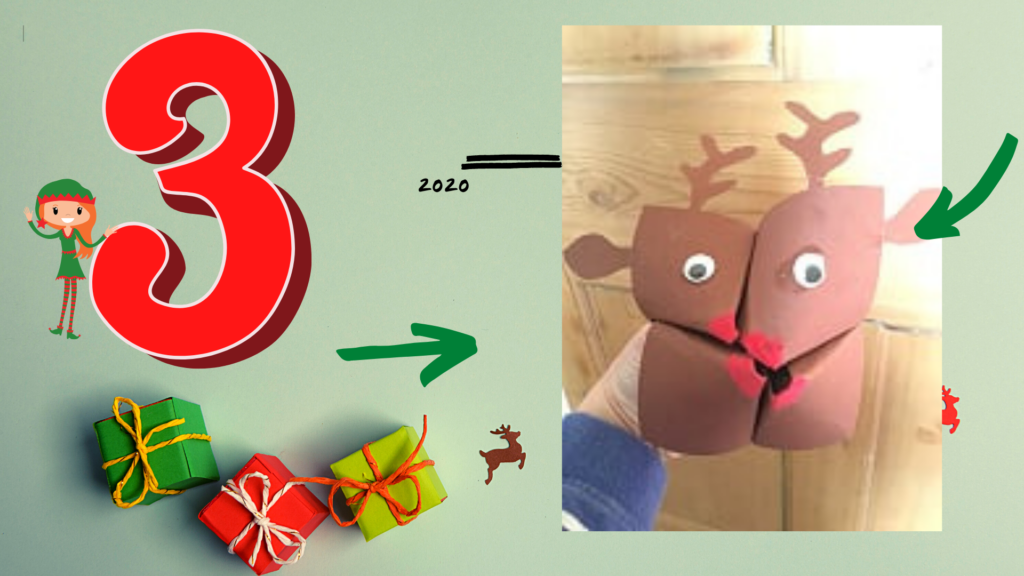
Reindeer Puppets
What you need:
- A4 Brown paper
- Eyes
- Red paint
- Scissors
- Glue
What to do:
- Take an A4 piece of paper and fold one corner across to form a triangle.
- Press down to crease the edge.
- Cut off the excess rectangle at the end with a pair of scissors.
- Open out the triangle and fold the opposite corners together.
- Press along the edge to form a crease.
- Open out again and, this time, fold each point of the square into the centre.
- Continue until you have a square.
- Turn the square over and fold the square points into the centre again.
- Press the edges down to crease.
- Now fold the fortune teller in half.
- Open out and fold in half along the opposite crease.
- Slip your thumbs and forefingers under the corner flaps.
- Your fortune teller is now ready for some decoration – Add the antlers, eyes and nose!
- Flip the square over and fill the triangles with numbers 1-8.
- Lift the triangle flaps and write down fun dares, games or fortunes underneath.Dance like an Elf, Pretend to be a reindeer, Sing your favourite Christmas Carol, Shake your belly like a jelly! Say HO HO HO like Santa, Sing Jingle Bells, What would you like for Christmas, Name 3 reindeer
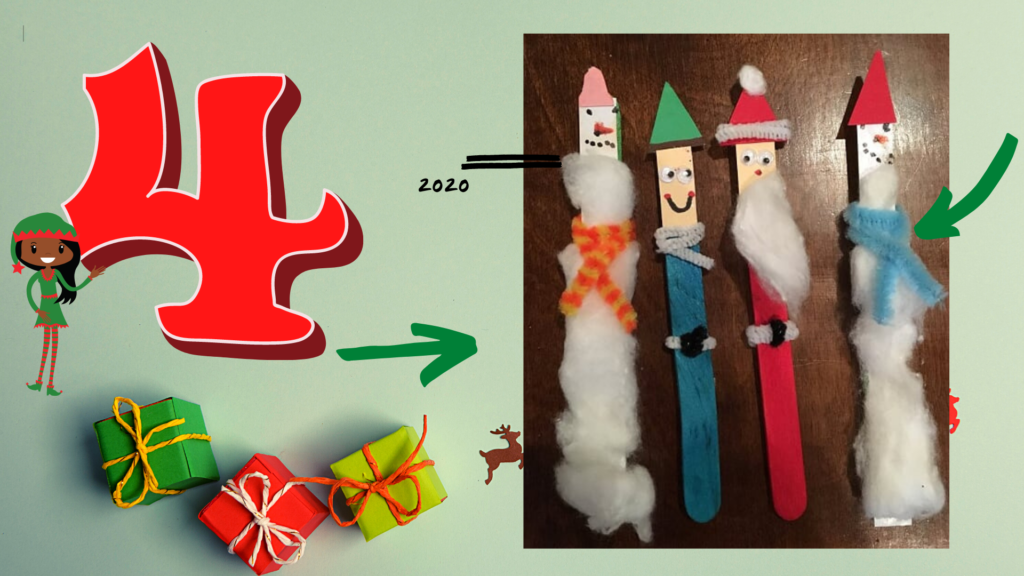
Stickmen
These are perfect for the kids to do to add to your Christmas table centre piece!
What you need:
- Lolly sticks
- Felt tips pens
- Coloured paper
- Cotton Wool
- Pipe cleaners
- Goggle Eyes
- Glue
- Scissors
What to do:
- Decide whether you are making Elves, Santa or Snowmen
- Take the stick, make the appropriate face with features
- Add a hat
- Add cotton wool for beards or snow
- Accessorise with belts, buttons, scarfs
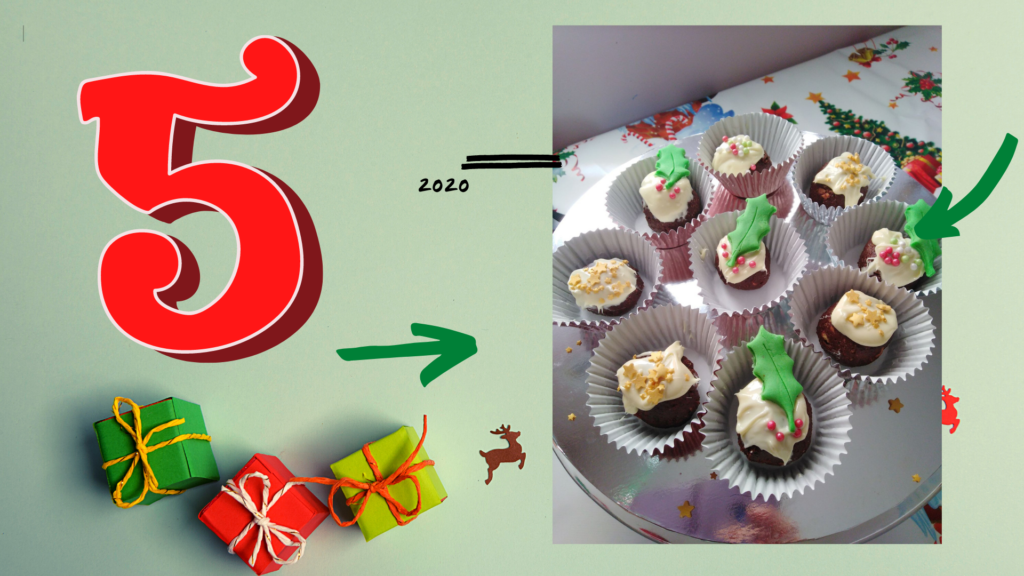
Crunchie no-bake Christmas Puddings Balls
We followed Fiona Cairns recipe in her Seasonal Baking book, but halved the ingredients (doubling what I have listed here should give you about 30 puddings)
What you need:
- 150g cooking chocolate (50% cocoa solids)
- 50g red glacé cherries
- White chocolate
- 100g digestive biscuits
- 2 full sized Crunchie bars
- 1 tablespoon Golden Syrup
To decorate:
- 75g white chocolate
- Red sugar pearls
- Green icing
- Gold stars or other festive toppings
What To Do:
- Crush the biscuits in a sealed ziploc bag with a rolling pin.
- Do the same with the Crunchie bars, but leave bigger chunks.
- Pour them into a mixing bowl and add the chopped glacé cherries and Golden Syrup.
- Melt the cooking chocolate, let cool slightly then add to the bowl. Stir everything together, resisting the urge to taste it (because it’s so good you’ll eat it all!).
- Use your hands to roll the mixture into balls (we got about 12), making sure to squish it together so the mixture will hold.
- Place each ball into a bun case or petit four case.
- Place in the fridge to harden slightly, while you melt the white chocolate. I find white chocolate really hard to melt without it getting too lumpy and grainy so I stir it constantly then remove it from the heat while there are still a few clumps of chocolate and finish smoothing it off the heat. Make sure your bowl and spoon are bone dry as moisture causes white chocolate to seize up too.
- Spoon a bit of white chocolate over each ball and decorate. We used sugar balls and gold stars. You can cut out holly leaves with green icing, or use any type of sprinkle or little festive cake toppers.Enjoy!

Christmas Crackers
Perfect Crackers for Christmas dinner!
What you need:
- Pretty paper
- Toilet rolls
- Double-sided tape or glue
- Cracker snap
- Prizes
- Ribbon
What to do:
- Cut a piece of paper into an 8 inches (20.3 cm) by 12 inches (30.5 cm) rectangle.
- Orient your paper landscape style.
- Attach a cracker snap (if using) to the top of the paper.
- Lay a strip of double-sided tape along the top edge of your paper, or some glue
- Use a strip of double-sided tape to attach an empty toilet paper tube to the bottom centre of your paper.
- Make the cracker body. Roll the toilet paper tube as evenly and as tightly as you can towards the top of the paper to keep the paper smooth. When you get to the top edge, run your finger along the tape to seal it.
- Tie one of the ends of the Christmas cracker shut.
- Fill the Christmas cracker with your choice of goodies
- Don’t forget the jokes!
- What do Santa’s helpers learn at school? The Elf-a-bet
- What is the best present in the world? A broken drum, you just can’t beat it
- What do you call Santa Claus when he doesn’t move? Santa Pause
- Why is Rudolph always wet? He’s a reindeer
- One snowman said to another snowman: “I smell carrots!”
- What do you call an igloo with a radiator? A puddle
- What do you get if Santa goes down the chimney when a fire is lit? Krisp Kringle.
- What goes oh, oh, oh? Santa walking backwards
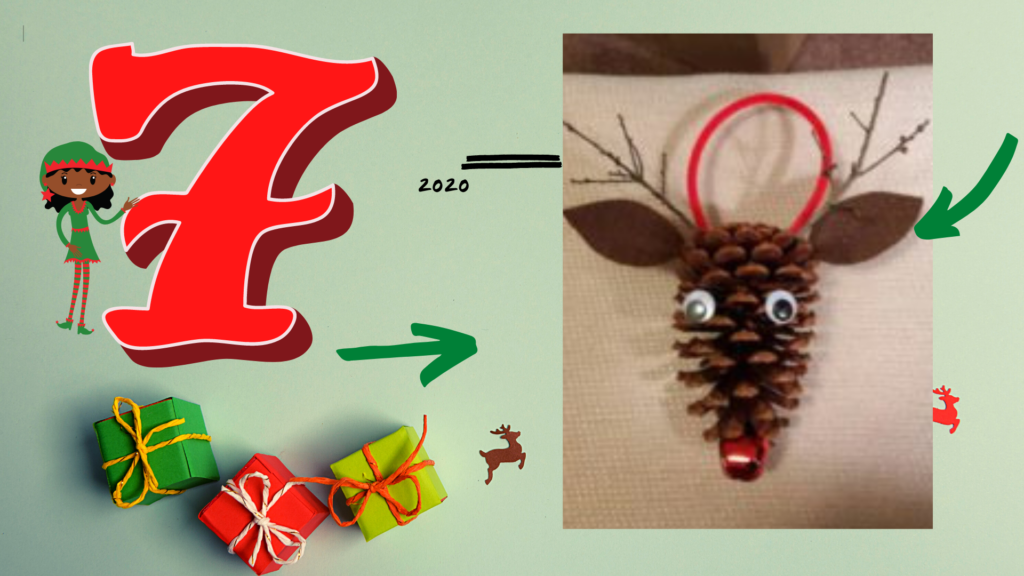
Pine Cone Reindeers
Make this great Christmas decoration….love him and so easy. Get involved in a nature walk first collecting the pine cone and the twigs for the antlers. Leaves or paper can be used for ears. Then away you go!
What you need:
- Pinecone
- Paper
- Twigs
- Goggle Eyes
- Glue
- Ribbon or wool
- Red pompom
What to do:
- Attach leaves or paper for ears.
- Glue twigs to the top for antlers
- Stick on the googly eyes
- Tie the ribbon or wool to the top of the cone
- Put a red pompom or ball of paper for the nose then away you go!
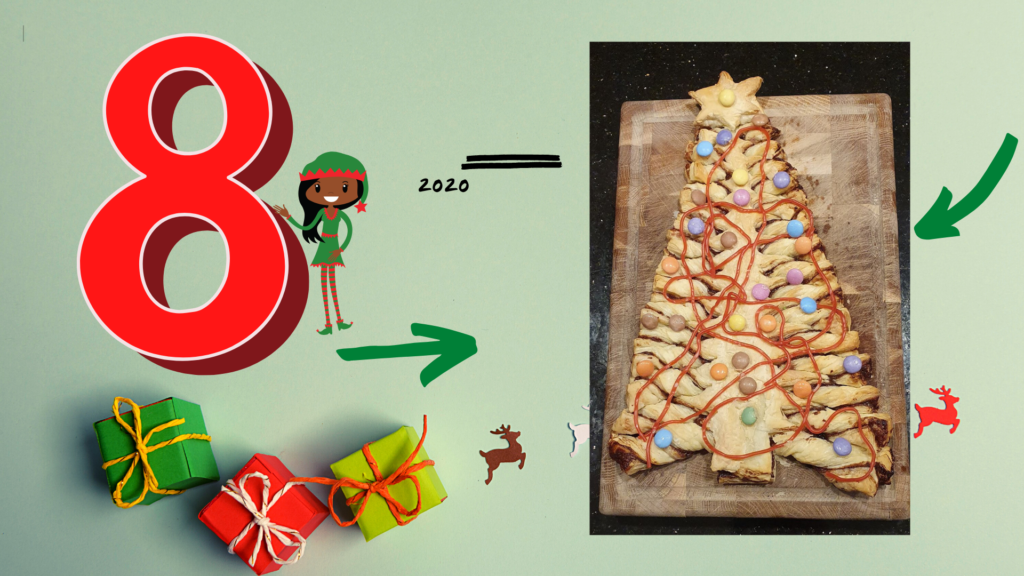
Christmas Tree Chocolate Pie
This is SO yummy!
What you need:
- 2 sheets of puff pastry
- Chocolate spread
- 1 egg yolk
- Smarties
- Strawberry laces
What to do:
- Remove the puff pastry rolls from the fridge and leave to come to room temperature for 15 mins
- Whilst you’re waiting, create a Christmas Tree template on a piece of paper. If you want to make it even, just fold the paper in half. Cut out the template
- Unroll the puff pastry sheets, leaving on the baking paper.
- Place the template on the puff pastry and cut around the template
- Spread chocolate spread onto one of the Christmas trees
- Place the 2nd puff pastry Christmas Tree on top
- Cut ‘branches’ up each side of the Christmas Tree approx. 1cm thickness
- Twirl each branch twice
- Cut a star from the remaining pastry and place on top of the tree
- Pop onto a baking tray and cook for 20 mins at 190C
- Remove from oven and let cool
- Decorate the tree with smarties baubles and strawberry lace tinsel!
For a savoury alternative try red pesto and goats cheese

Reindeer Hand Print Card
Something to send those loved ones you are missing this Christmas.
What you need:
- Card
- Paints
- A willing child
What to do:
- Paint one hand in brown paint and make two prints on a folded card
- Leave to dry
- Add antlers, hooves, noses and festive additions
- Sign and send to your loved ones!

Eco Gift Labels
Absolutely in love with nature gift tags from
unlock.fun
What you need:
- A selection of great leaves.
- Permanent markers.
What to do:
- Collect some pretty leaves.
- Let them dry inside a book for a few days
- Decorate to your hearts content! Super easy!
Thank you to unlock.fun for this great idea
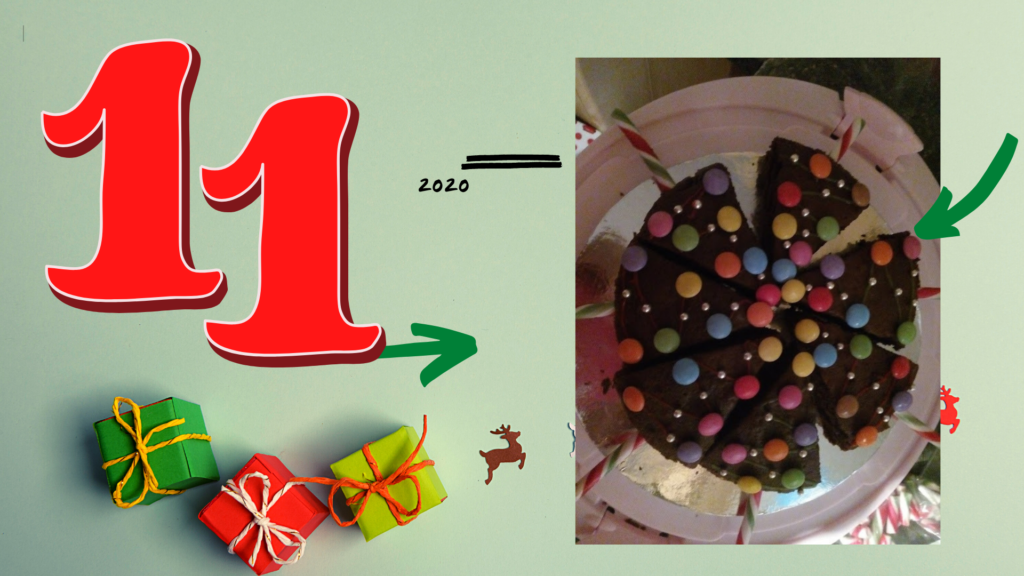
Christmas Tree Chocolate Cake Pops
This recipe is from myfussyeater.com and the cake is really delicious. The decorations are really easy for kids to do, and they will love using the icing pens too.
What You Need:
- 100g unsalted butter or marg, room temperature
- 100g caster sugar
- 100g self-raising flour
- 2 medium eggs
- 1 teaspoon vanilla extract
- 2 tablespoons cocoa powder
- 3 tablespoons milk
To decorate:
- Candy canes
- Smarties
- Silver balls
- Icing pens
- A dusting of icing sugar
What You Do:
- Preheat the oven to 180/160 degrees c.
- Grease and line a 9 inch cake pan.
- Cream the butter, sugar and vanilla extract in a mixing bowl, using an electric mixer.
- Add the eggs, one at a time, while mixing, then sift in the flour and cocoa powder and mix by hand.
- Add the milk and mix until combined.
- Spoon the mixture into the tin, flatten with a spatula and bake for 20 minutes or until a skewer comes out clean.
- Allow the cake to cool in the tin for a few minutes, then turn out onto a wire rack. It must cool COMPLETELY before you cut it, or it won’t hold its shape.
- Turn the cake upside down for a flatter surface, cut it into eight slices then decorate with icing pens to create tinsel and add Smarties and silver balls.
- Snap off the curved end of the candy cane, and insert the straight cane into the bottom of each slice. Dust with icing sugar and eat!Enjoy!
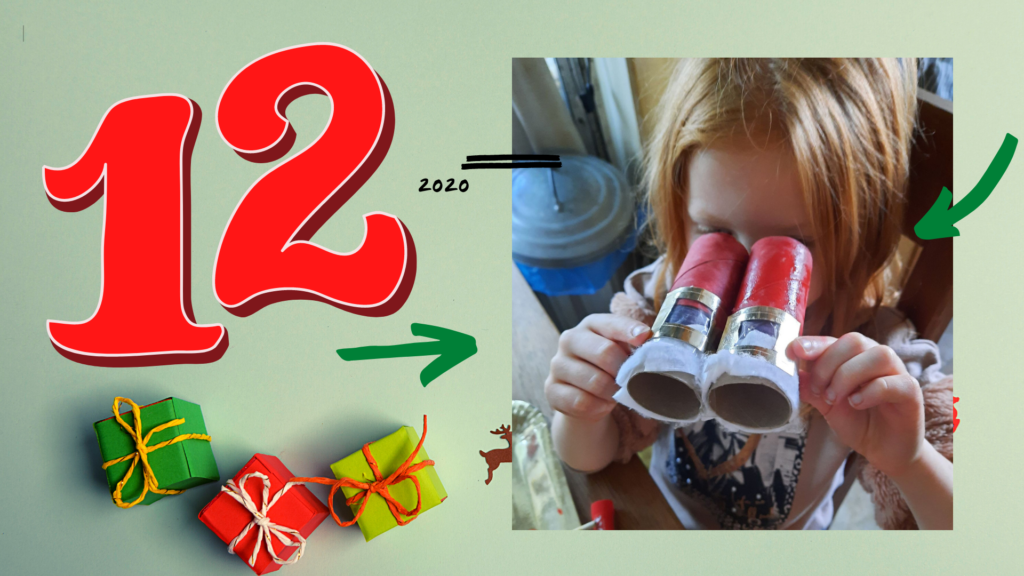
Santa Spotting Binoculars
We have made these every year since the Mini-Mumblers were little, they love standing out on Christmas Eve and searching for Santa in the skies! If you time it right you might spot the Space Station as it passes!
What You Need:
- Red card, pen or paint
- 2 toilet roll tubes per child
- Cotton wool pads or balls
- Black pen or paint
- Gold card or tin foil
- Glue and tape
What to do:
- Draw a black ring round each toilet roll tube about 3/4 of the way down
- Paint, colour or cover the above section red
- Take cotton wool balls (we used pads which we cut in half) and cover the remaining 1/4 above the black line
- Cut a buckle shape from card or foil and stick onto the black line to create Santa’s belt
- Tape both tubes together to create your Binoculars Use on Christmas Eve to see if you can spot Santa’s sleigh!